It all started as a normal rainy day in November and ended "beginning to look a lot like Christmas".
If you live in Louisville, KY then you are well aware of the inconsistent weather that takes place in this bluegrass state. This past week was no exception. The previous weekend's temperatures were as high as 75* F. But, sure enough, by Wednesday it had dropped to 30*F.
It just so happened that on this miserable, temperature declining Wednesday, I had the day off. (I just love being a teacher!) When all hopes of spending the day outside were shattered after looking out my bedroom window at the morning sleet, I decided to spend my lovely day off indoors crafting.
I spent a short couple of hours inside the cozy walls of my favorite craft store, Hobby Lobby. I wasn't really sure what I was looking for as I wandered up and down each aisle but I picked up whatever I found appealing and/or inspiring.
Once home, the crafting began! This is what I made:
 The first craft I made was a feather Christmas wreath. All I needed was as a styrofoam ring (about $2) and two feather boas (also $2 each). To start the wreath I hot glued one end of the boa to the top of the wreath. I wrapped the first half of the boa around the wreath until it covered 1/4 of the ring. Then I glued the boa in place. I continued wrapping the rest of the boa around the wreath until I ran out of boa. I secured the end of the boa to the styrofoam ring with hot glue. I repeated the same process with the second boa, covering the other half of the styrofoam ring. Once the ring was completely covered by the feather boa, I tied two ribbons to it. The first I just kept as a simple loop to hang the wreath. The second ribbon I tied into a bow.
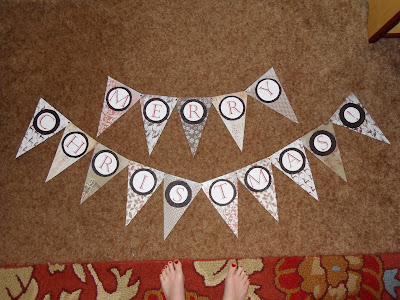
The next craft I completed was time consuming but well worth it. I created a "Merry Christmas" banner. To create this I bought a pad of Chritmas-themed scrapbooking paper ($20), 6 brown textured sheets of felt ($1/2 sheets), and brass fasteners ($2). I started the banner by cutting the patterned paper into triangles. I found it easiest to measure one triangle and use this as a template to cut the others from. Then I cut the textured sheets of felt into circles to place in the middle of each triangle. The top of a solo cup worked perfect as a template. Then I printed "Merry Christmas!" on cardstock in 200 size font with a space in between each character. Using a compass, I created a circle around each letter and then cut each one out. Using hot glue, I glued the letter on the felt circle and then glued the felt circle on to the middle of the triangle. Once each trianle had the appropriate letter, I poked a hole in the two top corners of the triangle. I laid the letters in order and began to fasten them together using the brass fasteners.
 And Voila! The end product:
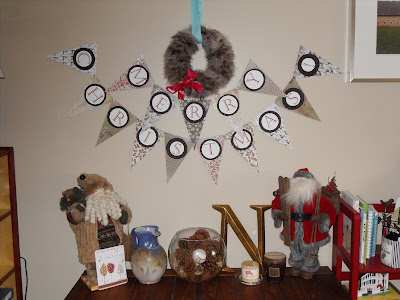
It's beginning to look a lot like Christmas!
1 comment:
I am totally going to make one of these wreaths!
Post a Comment